
Configuring the retraction system
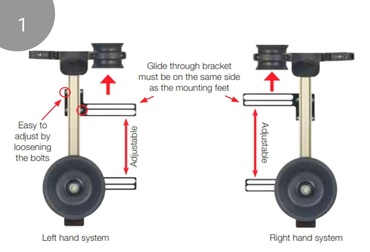
RSE wheel bracket arrangement
Note: RSE wheel bracket arrangement can be modified to opposite side if needed. Remember to keep mounting feet on the same side as the glide-through bracket
Mounting adapter
Mounting adapter installation example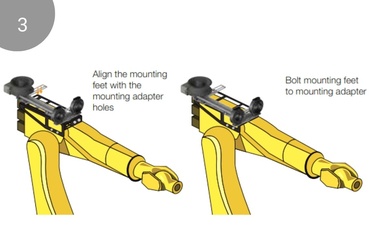
Retraction system installation
- Align the mounting feet with the mounting adapter holes.
- Bolt mounting feet to mounting adapter.
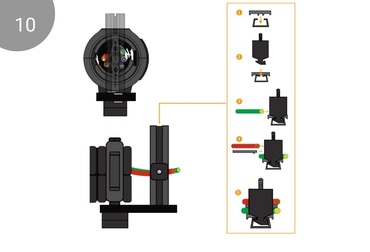
Axis 6 installation
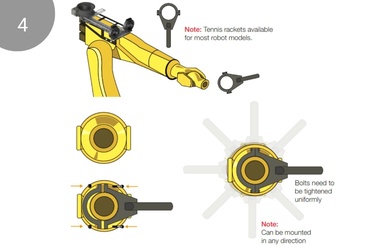
Tennis racket (axis 6 clamp) installation
- Tennis rackets available for most robot models.
- Bolts need to be tightened uniformly.
- Can be mounted in any direction.
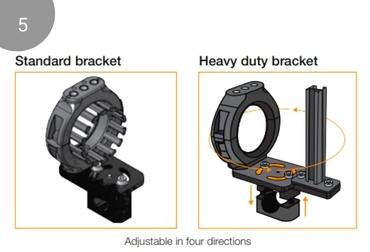
Standard and Heavy-duty brackets
- Adjustable in four directions
- Designed with integrated profile rail for CFX clamp
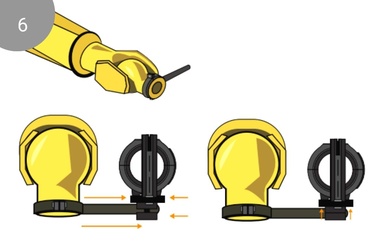
Axis 6 bracket installation
Install the bracket as close to the end of the handle as possible and tighten the bolts equally.triflex® R installation
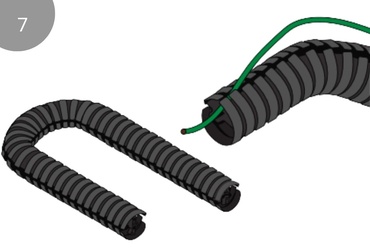
Cable installation
- Easy cable installation possible with triflex® TRE and TRCF only.
- If using TRC, cables will need to be fished through individually
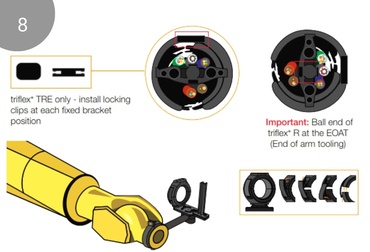
Install locking clips
- triflex® TRE only - install locking clips at each fixed bracket position
- Ball end of triflex® R at the EOAT (End of arm tooling)
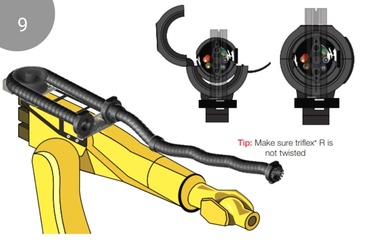
Install triflex® R
- Install triflex® R in axis 6 mounting bracket first.
- Make sure triflex® R is not twisted.
Installing CFX clamps
- Install CFX clamps to secure cables.
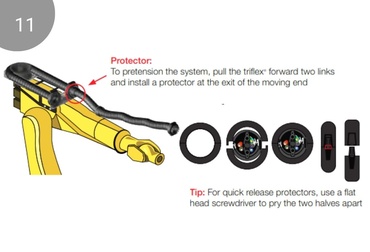
Installing protectors
- To pretension the system, pull the triflex® forward two links and install a protector at the exit of the moving end.
- For quick release protectors, use a flat head screwdriver to pry the two halves apart
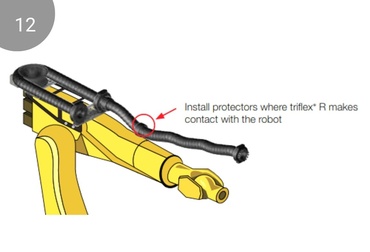
Installing protectors
- Install protectors where triflex® R makes contact with the robot.
triflex® RSE WHEEL troubleshooting guide
| Problem | Solution |
| triflex® R breaks when RSE System is fully extended |
|
| RSE System does not function |
|
| Carriage slams when the robot returns to the hom position |
|
Discuss your project with a triflex® R expert
We can assist you with a turnkey, fully assembled solutions or answer any questions you may have with a custom project.David Sandiland
Robotics Sales Manager - North America
(705) 313-2574
Contact an igus® expert now